
To send a message to an author, click on the author's name at the end of the article.
This Month in Ag Connection | Ag Connection - Other Issues Online
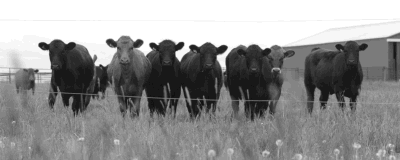
Selecting and managing replacement heifers can be a hot topic between beef cattle producers. There is a myriad of ways to select and manage heifers, and most producers have a system. These systems can be quite variable among producers, however, some data from the Show-Me-Select Replacement Heifer Development Program (SMS) database may provide some guidance on this topic.

In general, research has shown replacement heifers born early in the calving season have the following advantages: earlier conception in the breeding season, a tendency to have early born calves, their heifer calves tend to conceive and calve earlier, and their steer calves tend to have higher value carcasses. The benefits of managing heifers to calve early in the calving season produces older, heavier calves and more calves during the female's lifetime.
One key aspect of successfully getting replacement heifers bred is their reproductive status at breeding. This is determined by reproductive tract scoring (RTS). Heifers are examined and scored based on reproductive maturity on a score of 1 to 5. RTS 1 is infantile, RTS 5 indicates a heifer has cycled and is reproductively mature. In the SMS program, this exam is done between 30 and 60 days prior to the start of the breeding season.
The SMS database from 2010 through 2024 has data on slightly over 81,000 head of heifers. At the pre-breeding exam, approximately 2.5% of these heifers had a RTS of 1 or 2, meaning puberty had not yet been reached. The RTS 1 and 2 heifers had an average pre-breeding weight of 658 and 709 pounds respectively. Comparably, RTS 3, 4, and 5 weighed an average of 772, 812, and 834 pounds respectively. It is known, RTS is influenced by age, nutrition and genetics, so any single or combination of these factors could be the reason for the 176-pound difference in pre-breeding weight between the RTS 1 and 5 heifers.
A review of earlier data showed pregnancy to a fixed-timed artificial insemination (FTAI) protocol for RTS 1 heifers was 4%. Heifers with RTS 2 scores had an FTAI pregnancy rate of 27%, 48% for RTS 3, 52% for RTS 4 and 53% for RTS 5. Nearly 43,000 heifers were included in this analysis.
Two clear points emerge from these data sets. If a producer really wants to emphasize selection pressure on reproduction, repro tract exams should be done before the start of the breeding season and cull RTS 1 and 2 heifers. This can save development costs on heifers that have a small chance of becoming pregnant.
Secondly, pay attention to the pre-breeding weights of heifers. A goal is to have heifers near 60% of mature weight at breeding. If mature cows weigh 1,400 pounds, 60% is 840 pounds at breeding. There are a variety of ways to get heifers to this target weight. If there is a large weight spread in the heifer selectionpool, it would be cost effective to split the group into a heavyweight and lightweight group and feed accordingly to achieve the target weight at breeding.
For additional information, contact the local University of Missouri Extension Field Specialist in Livestock.
Source: Gene Schmitz, Livestock Specialist
This Month in Ag Connection | Ag Connection - Other Issues Online
Pesticides are valuable tools for controlling weeds, insects, and diseases in field crops. Combining two or more pesticides, or combining pesticides and fertilizer can save time, fuel, and labor. It is legal to combine products unless it is prohibited by the label, but that does not mean the products are compatible. Check compatibility before mixing in the spray tank by preforming a jar test or using a commercially available compatibility test. This precaution can prevent the mixture clogging spray equipment and avoid the need to clean up a very large mess.
Always read the entire label of all products being used to determine the proper mixing order. When performing the jar test, wear the personal protective equipment listed on the label for mixing and loading the pesticides. In a clean glass jar, add the components in the same proportions to be used in the spray tank. Water should be from the same source and temperature that will be used in the tank mix. Invert the jar at least 10 times to mix, let stand 30 minutes. If no separation, large flakes, precipitates, gel or heavy oil film form, the mixture can be used. If the mixture can be remixed after separation, the tank mix can be used if good agitation is provided. If it is determined the products are not compatible, adding a compatibility agent may solve the problem. Add the agent to the mixture in the jar, shake and allow to stand for one hour. Other options include changing the mixing order or changing the water source or chemical formulation. Make only one change at a time.
Mix the products in the sprayer once the components have been determined to be compatible. Start with spray equipment that has been thoroughly cleaned including the tank, boom, strainers, and nozzles, to prevent clogging of equipment and contamination from previously used pesticides.
Read all product labels before mixing begins. Any information on the label supersedes the general instructions below. Some general guidelines when using water as the carrier are as follows:
More information, including mixing pesticides and fertilizers in tank mixes, can be found in the Purdue Extension Avoid Tank Mixing Errors publication. https://ag.purdue.edu/department/extension/ppp/ppp-publications/ppp-122.pdf.
Source: Valerie Tate, Agronomy Specialist

This Month in Ag Connection | Ag Connection - Other Issues Online
The thought of starting a greenhouse is something gardeners consider. Walking into a greenhouse and seeing hanging baskets in an array of colors, cell packs of flowers and vegetables, and potted perennials can be captivating. But there is much to consider before making the decision.

Considerations
The size and type of structure, budget, time spent in the greenhouse, and location are all things to research before investing in a greenhouse.
Structure
A hobby greenhouse could be great for overwintering house plants, producing annuals/vegetables, and maintaining collections (e.g. orchids). This is impacted by the time of year it will be needed (spring only, winter only or year-round) and how much space will be needed.
Budget
A hobby greenhouse can range from a simple polyethylene-covered framework costing under $100 to an advanced $6,000 prefabricated structure.
Time
With automatic controls and easy-to-care for plants, maintenance can be kept to a few hours a week. Automatic controls provide proper growing temperature, artificial light, watering, humidity, and ventilation. If time allows to regulate the environment, money can be saved by not using automatic controls.
Site
The location is an important consideration. It determines what type of structure is practical; the direction and intensity of sunlight the greenhouse will receive, indirectly affect the plants which can be grown; the susceptibility of the structure to storm damage; and the ease and convenience of access as well as maintenance of the plants and greenhouse.
A sunny area is best. The most desirable choice for a greenhouse site is on the south or southeast side of the house or other structure in a sunny location. That is where it will capture the most sunlight from November to February. The east side is the second-best location, followed by southwest and west with the north side being the least desirable. Another site consideration is adequate surface drainage, so water drains away from the greenhouse site. Greenhouses should be located near utilities for easy access.
Greenhouse Structures
A separate workroom or small building attached to the greenhouse can be advantageous. Potting, seed sowing, soil mixing, etc. can be carried out while this room also serves as storage area for pots, growing media, stakes, pesticides, etc. Keep this building attached to the greenhouse so that during cold weather plants can be moved freely about without worry of freeze damage.
Greenhouse Heating, Cooling and Venting
A big challenge in Missouri is reducing the heat load with cooling, venting, and shading. A greenhouse is a heat trap because much of the radiant sun energy is trapped in the form of heat. Even during cold weather, a greenhouse can become too warm on sunny days. It is wise to grow cooler temperature plants during the winter and to switch to heat tolerant plants during the summer or do not grow any during the hottest months of the year. Ventilation and cooling are equally important. An automatic ventilation system eliminates the manual work and is the best way to control temperature and humidity. Heating, cooling, shading, lighting, watering, and fertilizing are things to consider, and will vary depending on the budget and the type of plants grown in the greenhouse.
The ideal temperature range for most greenhouse crops is 55° to 60°F for night temperature, and 70° to 75°F for day temperature. The day temperature should be 5° to 10° higher than the night temperature on a cloudy day, and 10° to 15° higher on a sunny, bright day. It is essential that a thermostat be located in the greenhouse in a central location, at plant level, and away from direct exposure to sunlight.
Sanitation
It is very important the greenhouse be kept clean. When this is overlooked, diseases and insects can rapidly become a major problem. Keep all paths and floors free of weeds and debris. Do not allow standing water or mud to get on the floors.
Conclusion
Greenhouses come in many sizes and styles. Things to consider include budget and the amount of time needed to work in and maintain it. Home greenhouses can cost a few hundred dollars to a few thousand. Because there is a lot of information available on hobby greenhouses, the best advice one can receive is do research. Spend time reading up on all the different types, construction materials, cost, etc. Visit friends or growers who have one.
Sources and for more information:
https://tinyurl.com/UofA-greenhouse
https://tinyurl.com/OSU-greenhouse
https://tinyurl.com/UofGA-greenhouse
Source: Jennifer Schutter, Horticulture Specialist
This Month in Ag Connection | Ag Connection - Other Issues Online

In 1976, the Centennial Farm project was initiated in Missouri to award certificates to persons owning farms that had been in the same family for 100 years or more. Missouri Farm Bureau joined as a program co-sponsor in 2008. This program has been sustained as a yearly event with over 100 farms recognized each year.
To qualify for this year's Missouri Century Farm Program, a farm must have been owned by the same family for 100 years as of December 31st of this year. The 100 years must be consecutive. This lineage can be through children, grandchildren, siblings, nieces, nephews, including through marriage or adoption. The farm must include a minimum of 40 acres of the original land purchased by the family, and it must make a financial contribution to the overall farm income.
Applications and details can be found at https://extension.missouri.edu/programs/century-farms.
Deadline is May 1, 2025.
For more information contact your local MU Extension Center.
This Month in Ag Connection | Ag Connection - Other Issues Online
Following are upcoming trainings in the area. Pre-registration is needed. To register for any of the locations below call the phone number listed.
Ralls County - Mar. 3 @ 1 p.m. Mark Twain H.S. Ag Building, 21622 Hwy. 19, Center, MO. To register call 573-985-3911
Moniteau County - Mar. 6 @ 6 p.m. California H.S. Vo Ag Bldg, 1501 W. Buchanan, California, MO. To register call 573-378-5358
Knox/Scotland Counties - Mar. 7 @ 1 p.m. Rutledge Community Center, 23615 Main St., Rutledge, MO. To register call 660-465-7255
Publishing Information
Ag Connection is published monthly for Northeast and Central areas of Missouri producers and is supported by the University of Missouri Extension, the Missouri Agricultural Experiment Station, and the MU College of Agriculture, Food and Natural Resources. Managing Editor: Mary Sobba.