
To send a message to an author, click on the author's name at the end of the article.
This Month in Ag Connection | Ag Connection - Other Issues Online
Several questions have come into Extension offices regarding the ammoniation of wheat straw to improve its feeding value. Below are guidelines for the ammoniation process.

Bales need to be covered to seal in the anhydrous ammonia. Use either 6 or 8 mil black or clear UV resistant plastic sheets for covering the stack. A 40' X 100' sheet of plastic will completely cover 38 bales of straw. Stack two bottom rows of 13 bales and one top row of 12 bales. Anhydrous ammonia should be applied at a rate of 60 pounds per ton of wheat straw, so it is important to weigh some bales to get an average bale weight. Once the weight of 38 straw bales is known, the exact amount of anhydrous ammonia can be purchased and the anhydrous tank can be slowly emptied under the covered stack.
To treat the straw, insert a 1 inch pipe into the center of the stack under the plastic and attach it to a steel fence post to keep it in place. Apply the ammonia slowly to the center of the stack. Three to 5 hours is suggested. Be sure to seal the sides of the plastic against the ground with dirt, waste lime, etc. Enough fill should be placed on the plastic to keep it from being pulled loose by winds and ballooning when the ammonia gas fills the covered stack.
Bales should be stacked in an area that has excellent air flow. Be aware that vegetation under the stack will be killed. Stacking the bales on gravel will help keep moisture from wicking up from the ground below, but be absolutely sure to get the plastic sealed to the ground completely around the stack in order to prevent the anhydrous ammonia from escaping.
Safety when working with anhydrous ammonia is of the utmost concern. Follow these safety instructions: 1) Wear goggles, rubber gloves and protective clothing. 2) Work upwind when releasing ammonia. 3) Have fresh water available to wash off any anhydrous ammonia that comes in contact with the skin. 4) Check all valves, hoses and tanks for leaks. 5) Check the plastic cover for leaks and patch with duct tape. 6) Do not smoke near anhydrous ammonia. 7) Keep children away from treatment area.
Keep the straw pile covered until 2 to 3 weeks before feeding begins. At that time, the ends of the stack can be opened to allow the stack to air out. The chemical reactions occur within a couple weeks during the summer months, but the pile must remain covered to maintain forage quality of the treated straw. When feeding begins, some producers will remove several bales from the pile a few days before feeding to allow the straw time to air out.
Toxicity can occur in animals when some forages are ammoniated, so only treat low quality forages such as wheat straw or fescue stubble following seed harvest. Consider working with a nutritional consultant to develop feeding programs. If toxicity issues do occur, avoid working the cattle and remove ammoniated hay from the diet for several days. A mixture of 50% ammoniated hay and 50% untreated hay should eliminate any problems.
Treating wheat straw with anhydrous ammonia does improve the straw's feeding value and can stretch tight hay supplies. However, utmost care should be taken when treating and handling the straw.
Source: Gene Schmitz, MU Extension Livestock Specialist
This Month in Ag Connection | Ag Connection - Other Issues Online
Here are some guidelines we are using to think through some of the many issues with pricing, harvesting and feeding drought corn to beef cattle. Given the situation, scientific precision is not possible, but we do have thumb rules based on university trials and expertise. There can be wide variation in quality, quantity, and moisture levels of drought corn.

Crop owners: check with your crop insurance agent before harvesting.
- Good silage yields for us are normally about 18 wet tons per acre. A rule of thumb for drought corn is one ton for each foot of corn height. Another guideline is one ton of silage for five bushels of grain that could have been shelled.
- Drought corn is often higher quality than it appears in the field. In terms of feeding value, stunted, no ear corn has about 70 percent of the feeding value of normal silage. For corn in the 5-20 bushel range, estimate feeding value at 80-90 percent of normal.
- Drought corn may be higher moisture than it appears due to slow dry-down in the stalk. For over-dry corn, water can be added as the bunker is filled. Figure four gallons of water added per ton of silage for each one percent increase in moisture content. Chopped corn needs to be 60-70 percent moisture for proper fermentation. Moisture testing in a microwave oven is recommended. See Guide 3151 http://extension.missouri.edu/p/G3151
- High nitrate feed kills cattle. Drought corn is likely to be high in nitrates. Corn can be tested before chopping, and should certainly be tested before feeding if there is any doubt. Ensiling reduces nitrate levels about 25–50 percent. Green chopping does not reduce nitrate and can increase toxicity if it is not fed fresh.
- A simple rule of thumb for pricing corn silage is to link it to the price of corn. One rule says that the low price for corn silage should be 5 times the price of corn. That's close to $40 per ton today.
- Another way to price corn silage is to compare it to the price of high quality hay and adjust for moisture. According to the weekly hay report from USDA grass hay is about $150 per ton for grass hay. An equivalent price for corn silage would be about $50 per ton. The dry matter in one ton of wet corn silage is equal to about one-third ton of hay. Alfalfa hay is quoted $160 to $275 per ton.
- Negotiations should consider, at minimum, the value of phosphate and potash removed in the silage—about $6-7 per ton of silage with current fertilizer markets, and harvest costs.
- Custom harvest charges will vary. A current rate to chop and haul is reportedly in the $100 per acre range. A 2011 Iowa survey returned average rates of $36.80 per hour per head row to chop and $48.80 per hour per head row to chop, haul and fill. (Engineering estimates for a two-row, pull-type chopper are 1.38 acres per hour and 6.79 acres per hour with a modern 8-row, self-propelled, forage harvester.) A 2009 Missouri survey returned values in the range of $30 to $100 per acre to chop only with an average of $59 per acre.
- Finally, market and crop conditions are changing rapidly, but it is still important to negotiate using some basic economic rationale. Total forage supplies are tight, but there is a lot of drought corn available in many areas.
Source: Brent Carpenter, MU Extension Ag Business Specialist
This Month in Ag Connection | Ag Connection - Other Issues Online
Operator protection: Even with the best precautions, you may be involved with the accidental release of ammonia. Simple protection can prevent serious consequences if used consistently.
It is important to wear properly fitting goggles or a face shield when working with ammonia. A face shield will help prevent you from breathing a direct blast of ammonia and also will reduce possible eye exposure. Regular glasses do not provide adequate protection. Never wear contact lenses when working with ammonia. Ammonia might get under the lenses and cause permanent eye damage before you can remove the lenses and flush your eyes with water.
Loose-fitting rubber gloves with an extended cuff are recommended for handling anhydrous ammonia. Turn the extended cuff down so ammonia does not run down your sleeve when you raise your arms.
You can remove gloves that fit loosely in case of an emergency. You can further protect your arms from splashes by wearing heavy-duty clothing such as coveralls or work shirts that cover your arms. Thin dress shirts or short sleeves don't provide satisfactory protection.

First aid = water + water + water
Every second is critical when someone is sprayed with liquid ammonia or engulfed in concentrated vapors. Exposure to anhydrous ammonia can be harmful if it contacts the skin and eyes or if it is inhaled or swallowed. When ammonia contacts the skin or eyes, tissue damage occurs rapidly. Immediately flushing the exposed body area(s) with water is crucial.
Regulations require that all farm vehicles used for anhydrous ammonia carry a container filled with at least 5 gallons of water. This water must be readily available for flushing the eyes and skin in case of exposure. You should change the water daily to ensure you have a clean supply.
Safety specialists recommend you keep a second 5-gallon container of water on the tractor. This provides another source of water for first aid in case the tractor operator is unable to reach the water container on the nurse or applicator tank. You should also carry a 6- to 8-ounce, water-filled plastic eye wash bottle in your shirt pocket. It provides an immediate supply of water if an accident does occur. The objective of the eye wash bottle is to get the excess ammonia out of the eyes in the first few seconds until you or the victim can get to the larger water supply to continue flushing.
When a victim has been exposed to anhydrous ammonia, move him or her to a safe place and flush the exposed area immediately with water for a minimum of 15 minutes. Remove contaminated clothing as soon as you have thawed them out.
Do not apply salves, creams or ointments. They won't stop the damaging action to skin. Contact a doctor immediately after emergency first aid treatment. Even if small amounts of ammonia enter the eyes, irrigate them immediately with water for 15 minutes or more. Hold the eyelids open during irrigation to ensure water contacts all parts of the eye. Immediate first aid is important to avoid partial or total loss of vision. Again, consult a doctor after giving emergency first aid.
Further information on anhydrous ammonia safety can be found in the MU Guide – G1920, Using Agricultural Anhydrous Ammonia Safely - http://extension.missouri.edu/p/G1920
Source: Kent Shannon, MU Extension Natural Resource Engineer Specialist
This Month in Ag Connection | Ag Connection - Other Issues Online
Millions of Americans ride horses every year whether it is for pleasure, work, or competition. Experienced riders may be injured just as quickly as inexperienced riders; therefore, safety cannot be overemphasized. Riders of all disciplines should have a working knowledge of horse behavior in order to avoid and/or preventdangerous situations (see MU publication G2862, Practical Horse Psychology; G2878, Safe Ground handling of Horses).
Pre-Riding: Ensure the skill of the rider is matched to the horse's temperament and the rider is comfortable with the chosen horse. All riding equipment should be appropriate for the occasion and inspected regularly. Worn or damaged parts should be replaced prior to use. Ensure the horse's tack fits well and is clean.
Dressing properly is important for the safety of the rider as well as the horse. Riders should wear closed toe shoes with smooth treads and a 1-inch heel to prevent the foot from slipping through the stirrup. Steel-toed shoes are not recommended. It is best if shoes cover the ankles. Long pants should be worn for the comfort of the rider, in order to prevent saddle sores and to protect the legs from the riding environment. Avoid loose-fitting clothing which could get caught in equipment and may lead to dragging or trapped limbs. Always protect your head by wearing an ASTM/SEI-certified helmet. When choosing a helmet, measure your head just above the ears and around the widest part of your head. Use centimeters for a more accurate measurement. Try on the corresponding helmet making sure it slides down to just above the ears. You want a firm snug fit but not tight. Try to slide the helmet forwards and backwards, if it moves try the next size down. The helmet should not slide forward, backwards, or sideways. A general rule of thumb is that when rocking the helmet back and forth your eyebrows should move up and down. The straps should be snug under the chin but not uncomfortably tight.
Preparing the horse for the ride is also important and can prevent harmful situations from arising. Cleaning the feet of the horse is important before rides to ensure there are no foreign items which could cause lameness. Use a hoof pick from the heel to toe and clean the entire ground surface of the hoof, making sure to get into crevices. Move down the center of the frog, on each side and around the bars of the hoof. Prior to saddling, the horse should be groomed thoroughly to ensure there are no sores or debris (mud, burrs, etc.) on his back or in the cinch area. The saddle and cinch may irritate any sores or debris, and this may cause the horse to wring his tail or buck. If saddle sores are present, give the horse time off until the sores heal. While grooming, always keep your free hand on the horse's body so you can feel if they become tense or can use that arm to push yourself away from them quickly if needed. Using a rubber curry, which is designed to lift deep dirt and loose hair away from skin, begin grooming on the left side of the horse at the top of the neck, and work in a backwards circular motion against the grain of the hair. Use extra care when currying under the belly and in areas where bones are close to the skin. Do not use a curry comb on the head or legs, as these are sensitive areas. Next, use a coarse brush in the direction of the hair to sweep the dirt and hair away. Fly control is necessary for the comfort of the rider and horse. Water based-insecticides can be sprayed directly onto the horse, while it is recommended oil-based insecticides be rubbed on with a rag. You should follow the directions on the chosen fly spray bottle. Be careful around the eyes as some water based insecticides may have a tendency to wash out with sweat.
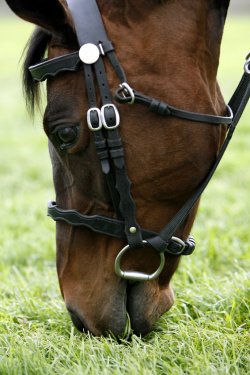
Haltering: Be sure to use a halter that fits the horse properly. The headpiece or crown piece should lie flat behind the ears, and the throatlatch should lie flat at the swell of the cheek with no big gaps when horse is viewed from the front. The jaw piece should show approximately two finger widths below the cheek bone with approximately three finger widths below the gullet so the horse can move its jaws comfortably. It is recommended not to pasture horses with halters; if it is necessary, though, use a leather halter instead of a nylon one. Leather halters are easier to break if the horse should happen to become hung on something. To halter the horse, approach the horse at the left shoulder, while talking calmly to the horse. It is recommended to lead from the left side while walking shoulder to shoulder; however, handling the horse from both sides also helps prevent you and the horse from becoming “one-sided.” Never wrap the bight (excess) shank around your hand to prevent getting trapped and potentially dragged; instead wrap the bight in a figure eight and hold this in your hand. When turning your horse while leading you should turn the horse away from you (to the right) to avoid being accidentally stepped on.
Saddling: Before saddling your horse make sure he is haltered and secured using a quick-release knot in a safe place free of objects on the ground to prevent tripping. Ensure the saddle is a good fit for the horse so as not to put undue pressure on the withers or restrict the movement of the shoulders. Check the blanket for foreign objects or dirt buildup, and be sure that the blanket is dry. Place the blanket well forward over the withers and pull it slowly and gently toward the rear to lay the hair down. Never pull the blanket forward. Make sure there are no wrinkles in blanket or saddle pad. If using a western saddle, hook the right stirrup over the saddle horn and lay the cinch over the seat of the saddle prior to placing the saddle on the horse's back. Pick up the saddle as high as possible and place it a bit too far forward of where it should lie, then ease it gently back onto the blanket or pad and settle it into its place. The saddle should be placed so at least an inch of the blanket lies in front of it. You should tent the saddle blanket or pad under the gullet or pommel so that, when tightened, the saddle doesn't cause excess pressure over this area. Walk carefully behind the horse to be sure the saddle is centered over the back of the horse. Move to the far-(right) side of the horse and let the cinches and stirrup down if using a western saddle. If this is done from the near side, the cinch and stirrup can hit the side of the horse and startle him or bruise his sides. If using an English saddle attach the girth on the far side. Move back to the near side and reach under horse with your left hand to catch the front cinch or girth. Pull the cinch or girth up firmly until it is just tight enough to prevent slipping. If a back cinch is present, tighten it leaving a hand's width between the cinch and the belly. The back cinch should be tight enough to prevent a foot from being caught but not tight enough that the belly will touch the cinch when the horse breaths. After a few minutes tighten the front cinch or girth another 1-2 holes and secure the strap through the keeper. (To be continued in the September issue)
Source: Heather Smith, MU Extension Assistant Livestock Specialist
This Month in Ag Connection | Ag Connection - Other Issues Online
Publishing Information
Ag Connection is published monthly for Northeast and Central areas of Missouri producers and is supported by the University of Missouri Extension, the Missouri Agricultural Experiment Station, and the MU College of Agriculture, Food and Natural Resources. Managing Editor: Mary Sobba.
Send comments and suggestions to:
Mary Sobba, Agriculture Business Specialist
101 N. Jefferson St., Rm 304
Mexico, MO 65265
(573) 581-3231
sobbam@missouri.edu